These are some more alternatives for a new work. I am struggling with this collage / assemblage. This will “go somewhere”, I think. I plan to complete a finished piece incorporating the print and one of the two angels, but it may not look like much this.
The parts that I am considering include the burn sienna colored paperclay angel, a tinted but transparent resin angel, a small low relief resin tree, leaves or scans of leaves, and a shellac coated poly-lithograph print of trees. The conceptual title is “Reason to Worry”.
I have a sheet of copper that could become a good background for this piece (instead of the chipboard used above). And if I stay with a background & use a mat, I will not use this poorly cut & tinted cardboard, this is merely a temporary stand in for something better!
However the print and angel fit into another possibility entirely, some variation of this drawer piece:
Sometimes less is better! I rather wish that I did not have so many more alternatives for a new work!
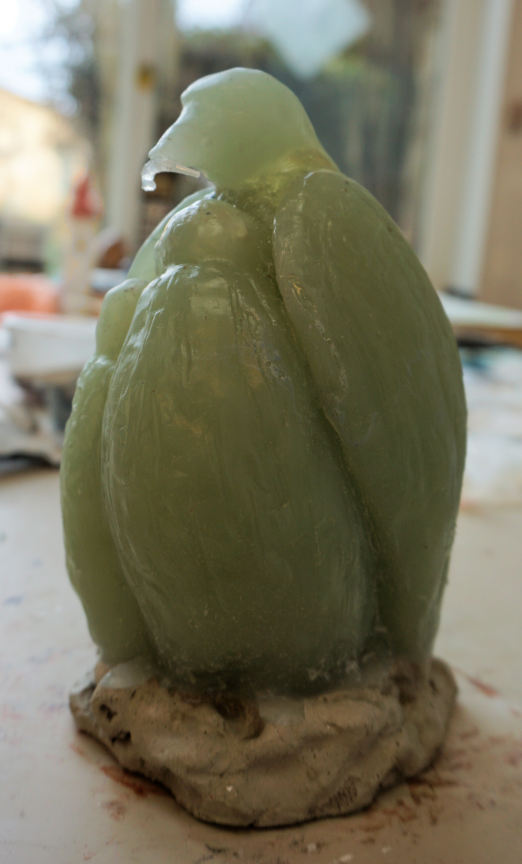
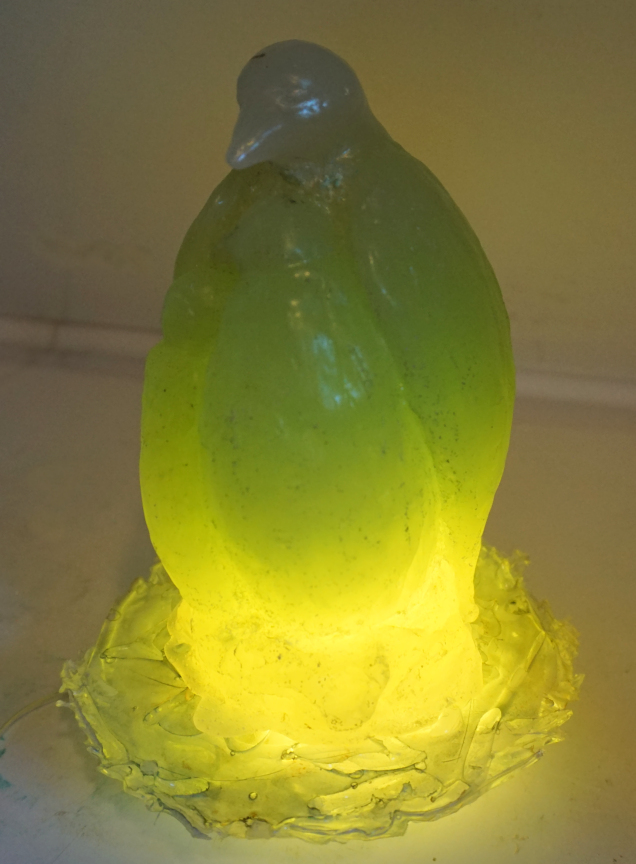
Birds in Nest Jade II, my new cast, is not a replica, even though I made this using the new mold of my oil-based clay model Birds in Nest. Read on to find out why! Love, protection, nurture & safety are all present in this small sculpture. A mother bird protects and nurtures two chicks who snuggle to her breast for warmth and safety.
The new, second mold I used for this corrects a major flaw in the first mold. The new mold also includes some improvements I made to the original clay model. So I have a better mold of an improved original work.
About this Cast
But what makes this cast unique? Well, a few things! First I should explain: I just don’t really “do” editions. They bore me! I am a creative artist, unwilling to become a technician unless I really need to. I prefer to experiment and to play. So this first cast in the new mold has a few experimental and custom features!
Birds in Nest Jade II is a mixed media cast: I cast the birds in a custom tinted resin, with “inclusions” of natural quartz and fragments of hardened colored resin. These are not prominent, but are visible. The inclusions show slightly in upper part of the piece, in the baby bird’s head, in the mother birds wing, etc. I believe this makes the piece more interesting, with a bit of the variety of natural stone. I used acrylic modified cement for the birds’ nest. The two materials were poured into the same mold, a few days apart. I have joined the two parts securely by embedding threaded hardware across both sections.
Once I removed my birds from the mold, I cleaned and smoothed a few imperfections, and added a special touch: this mother bird holds food for her young. It is perhaps a worm, or a tiny fish… I certainly don’t know!
First cast is at left, second cast is featured in the right two photos
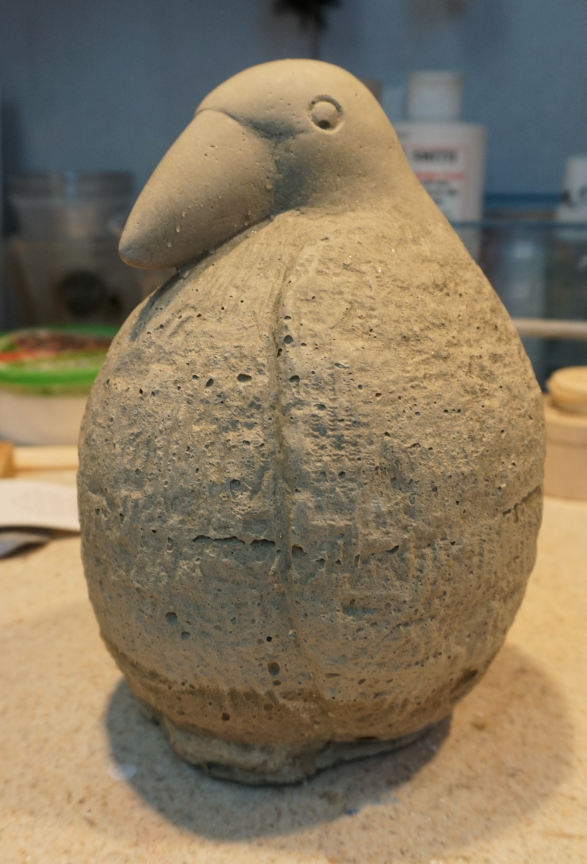
Here is my first Fat Baby Bird cast in cement. This is the first cement “pour” in my new mold, and this mold is fine! Unfortunately my casting was flawed; I did not mix enough cement, and with the RapidSet material mixed fairly thick for strength, the layers show. So this first cast is far from perfect, but good enough to prove the mold and to please me. After all I know that I can do better with the next one!
I rather love the air bubble that was trapped in the eye. This accidental void actually perfectly matches the personality of my quirky fat baby bird, and makes this first proof special. So a good several days work, I think. And I will make another fat baby bird cast today.
Time passes … and we have the second cast. This time I mixed enough material, BUT I used a slightly different mixture (RapidSet CementAll instead of the high strength Mortar Mix). This seems much harder to mix well: it was lumpy and since it sets so quickly, I get in a hurry mixing it. I fear there are weak spots in this cast, where there were unmixed dry lumps of cement! I don’t seem to have any trouble mixing the Mortar Mix, which has a larger grit sand, I think. The dry material did not seem lumpy, but perhaps I need to mix it more, or even sift it before adding water. That would be a big pain!
I am trying out various options for this arrangement before I work up a final piece. I am currently quite in love with the concept and the arrangements, but of course that will change. I will probably hate the finished work when complete, for at least a few days if not longer. And then I will fuss with it, possibly altering and even ruining it. I can usually “fix” my ruined pieces, but not always!
I think the dimensional pieces will need to be embedded to be secured in a finished artwork, with the paper protected. I don’t like putting anything behind glass anymore. This may mean an epoxy resin pour, with all the stress and mess that entails. I don’t really want high gloss though. Must think!
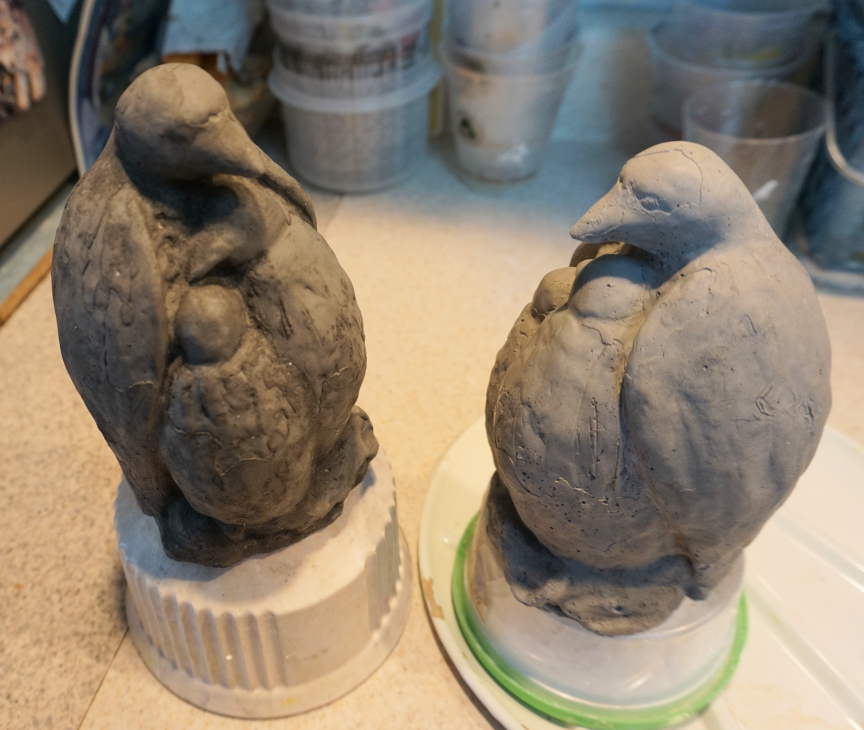
I have two new molds, both molds from sculptures of birds. My first stone carving, Fat Bird, will soon be available as a limited edition cast. And I have a new, better mold of my Birds in Nest.
It was a long working day yesterday! I applied several coats of (the orange) silicone for both of these molds, using Smooth-On Rebound 25 platinum silicone. Mold-making can be an endurance exercise! It is tedious work to carefully apply coats every 45-60 minutes. Once the first coat has been applied, the timing for subsequent coats is important, and the work is messy and requires my full attention.
This morning I made the plaster “bandage” two piece mother molds. The layers of gauze plaster strips are applied in one go, but the first sections must set before the second sections are built. So I completed the plaster sections more quickly than the silicone inner molds, but I find the work just as messy and finicky. It is now mid-afternoon, and I just carefully removed the (almost dry) rigid plaster mother molds. It is a great relief to get these off without any problem.
I built up a cut seam in the silicone for Birds in Nest, but the Fat Bird is a glove mold. I wanted to avoid a seam, but I worried about removing the mold. And I did have to cut the thickened flange to remove it, so I will have to be very careful not to tear it!
Tomorrow I may pour a cast if I have the energy! I may need a recovery day! Also I don’t know if I will use my usual RapidSet cement for Fat Bird. Perhaps I will look into using a stone dust product instead.
Fourth cast from 1st mold
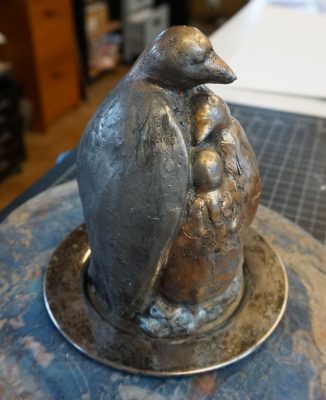
I have painted this third cement cast from that first defective mold of Birds in Nest. This mold is now completely missing the defective first detail coat of silicone, but is still a usable mold. I have four casts from this first mold: the first is my translucent jade green resin cast, the other three are cement. This cast has black cement color added to the mix, and has been dry rubbed with metallic paints, and sealed.
Before making the new mold, I increased the depth of detail on the original, and I added a bit more material all around the base/nest to make it more complete. This brings the bird up of the surface all the way around, and makes the piece looks better from the back! And this time I used the right silicone for all the mold coats!
So I expect to like the new casts better, but they will be very similar to this one.
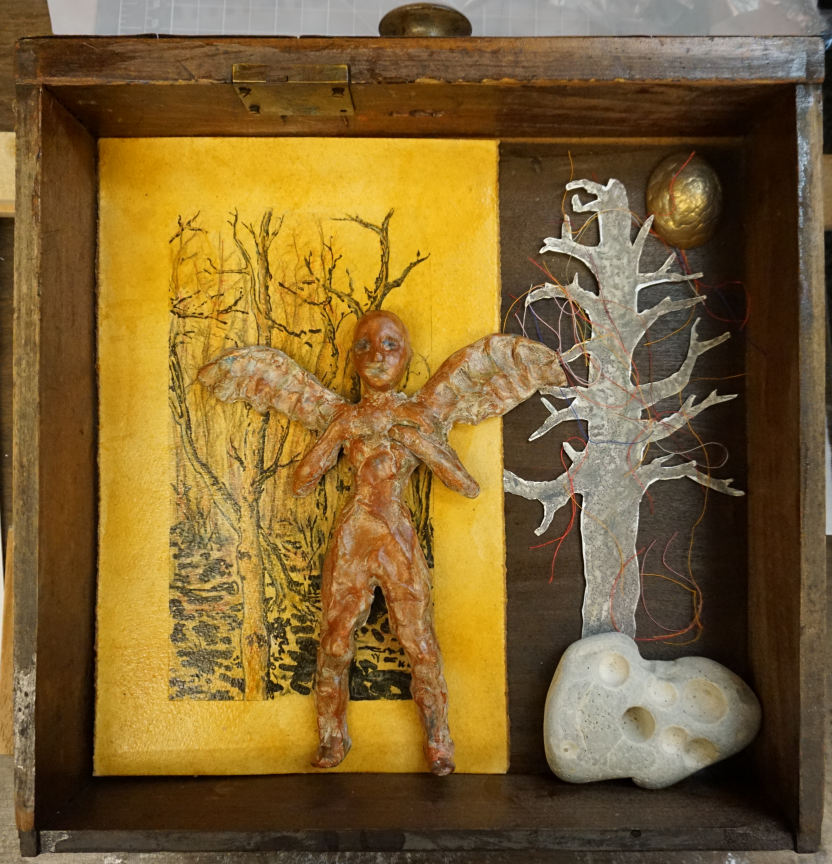
Jump Rope with the Moon, 12″ x 13″ X 3″ mixed media artwork
Now set in resin, ready for final touch up & tweaks, TBD (actual photos of work at left, foil of photos on the right, of course)
Jump Rope with the Moon is a bas relief mixed media artwork, original pieces of artwork (paperclay, epoxy resin, fiber) set in poured resin into a found wooden drawer. Somehow playful but serious at the same time, two field workers play jump rope with a somewhat puzzled moon, attended by a swooping bird.
I decided the “shooting star” & grasses, shown in the upper photos, make the piece too busy. So these are not present in the resin set version below, and probably will not be added back in. I am considering the possibility of adding lighting inside the box/drawer, either on the left side or along the top. Would be a pain to do, but not terrible, but I am not sure it is a good idea!
I have another option at this point: I can “dull down” the glossy resin. Again, I have not decided to do this, as I find this artwork pretty satisfying as is!
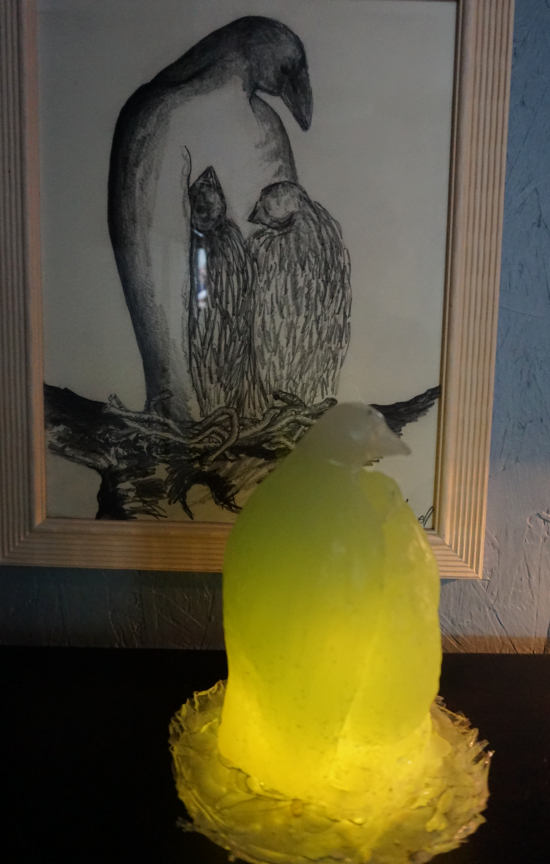
I have adjusted the nesting bird so that the light inside now gently lights up into the young birds heads … but not the mother birds head: the photos above show progression of lighting from left to right, then lights out!
Above is a nest base for my mother & two babies bird sculpture. This was an experiment that is nothing like I had planned, but it works! And I am inspired to experiment further, of course!
Front row: casts in green translucent resin, black pigmented cement, & basic cement. I have four casts now, three are RapidSet Mortar mix. The one at the far right has been painted. Middle photo is of same cement as the first photo, with different lighting.
On the stand is the oil based clay original, reworked a bit for re-use. I do want to make a better mold of this before squash it away!
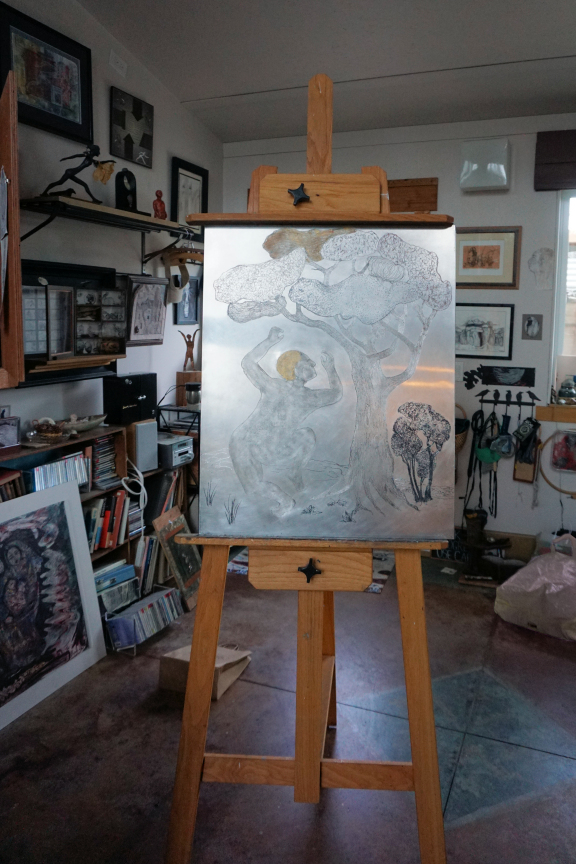
I still don’t know what the final product will be for this piece. I don’t expect to try printing from it again, and certainly not without reworking it with engraving tools. So how to finish and present this?