

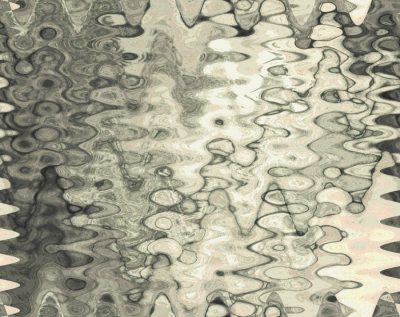
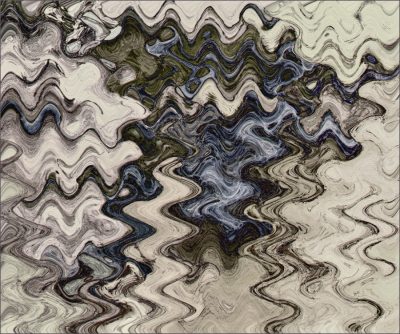
These are original drawings, scanned and digitally altered. Lots of enhancements used, but the primary effect used is a “wave” distortion. You need to select & see the larger image to enjoy these…
Category Archives: About my art

Found: Fantasy Night Heron
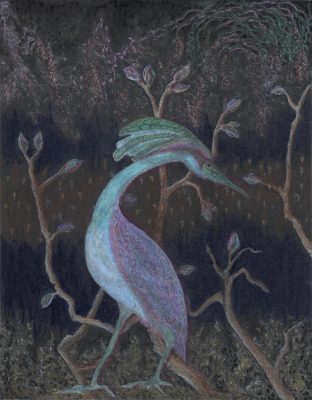
1) purchase special black art board,
2) sketch with pastel sticks,
3) scan,
4) repeat #2 &3 four times,
5) draw w/metallic ink & paint pens,
6) scan,
7) add colored pencil,
8) repeat #5-7 several? times,
9) print color-adjusted, previously drawn scanned fantasy heron,
10) position & glue heron,
11) scan,
12) work on heron w/colored pencils & adjust background,
13) scan,
14) repeat #12-13,
15) hang in RW Common House,
16) lose for 3 weeks,
17) find returned to my CH cubby, 18) add dappled shadows,
19) scan,
20) glue on fine pieces of embroidery threads, & touch up with colored pencil after glue dries,
21) scan & publish here.
BTW, I left out a few steps for the sake of brevity!
A Very Custom Base
I need a very customized wall mount base/backing for my latest delicate alabaster carving. The stone has fracture lines, and is by nature very soft. It needs to be reinforced and cradled, rather than displayed free standing.
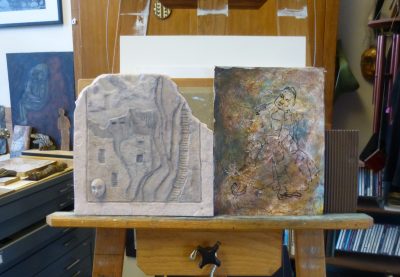
I have cut a piece of plywood to the desired size, and printed a design to mount to the backing. I removed a center section if the wood to allow the deeper portions of rough back to be set into the hole. The carving has an irregular shape, and is uneven in thickness. The cutout in the wood is crudely shaped and does not match the stone.
My trick is to use epoxy putty, from Aves, to build out the cutout hole around the back of the carving in order to fit. Then I will add more epoxy clay to the back of the wood and the stone carving, to join them together and to reinforce the carving across the natural faults and fractures of the alabaster.
I was struggling with the idea of partially embedding the carved stone in liquid epoxy resin to create a reinforcing base. But I could not come up with a satisfactory implementation plan. Then the light dawned: I decided to use epoxy putty/clay rather than liquid resin, leaving the face of the sculpture free.
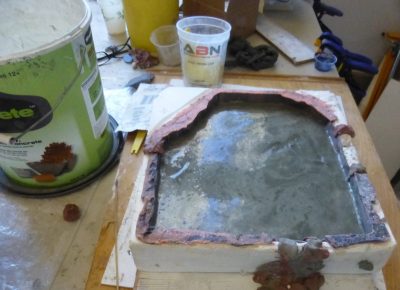
Rather than creating the backing entirely from epoxy, I decided to start with wood. The base will be flat around the stone, which will protrude about 2″ out from the surface of the background. I will use the epoxy putty first to refine the shape of the cutout to surround the stone, then to build up and adhere the back of the stone to the wood.
This will take two or more steps to complete the epoxy.
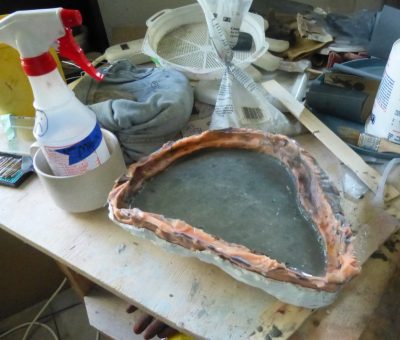
Step one, drying now, is to use the stone as a mold to shape the opening in the wood base to the rough stone:
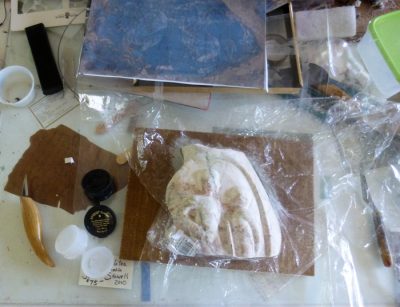 The idea is that the plastic will allow me to lift the stone out after the epoxy dries, so I can cut out and glue on the printed design, before I attach the stone to the base. The print I plan to use is partially showing in the above photo.
I may need to use a lot of epoxy on the back, and/or add some weight to balance the stone; I am bit worried about this aspect! It is all an experiment, but I really hope it works!
New Words
New words for old ideas:
Reading an Oxford University “Short Introduction to the Meaning of Life”, I discover/decide that I am a creator of fiction. As a voracious reader, primarily of fiction, I used to think I might be a writer of fiction. But that never came to pass, I did not even dabble in writing with any energy.
Instead I (eventually) became a mixed-media artist. As such, I decide now that I do create fiction: I am a fiction writer without words.
I justify this notion on the basis that I am certainly not a representational artist striving to realistically portray the world around me. I am in no way a documentarian, seeking to identify and describe actual events or objects. The idea or recording what I see in front of me bores me to tears.
So I seldom draw or paint what I see directly.
I don’t make art to record people, places, or things; I create in order to satisfy something in myself that I cannot put into words, or record with a camera.
While I certainly include representation in my work, it is rare that representation is the primary purpose or focus in a finished artwork.
Perhaps I use “indeterminancy and obscurity” to reflect (rather than portray) a personal and emotional truth.
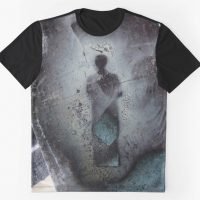
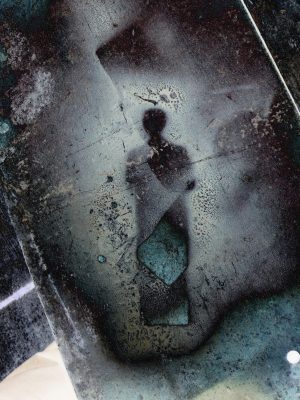
Products for Sale
The above images are available for sale printed on a large line of clothing, housewares, and miscellaneous useful items. All at my newest print-on-demand site: RedBubble. View these and other works at: www.redbubble.com/people/ptartist/
I confess I have not ordered or seen their products yet, but the site has good reviews, and I expect the products will be satisfactory! If not, I will pull my art off & delete my account!
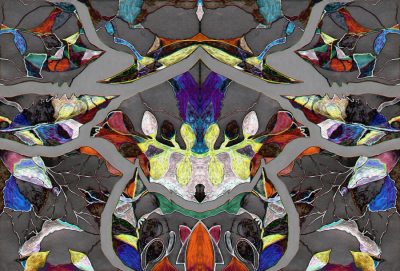
Arrival is a richly textured & deep colored image featuring a silhouetted figure evokes a nameless mystery.
Taken Apart: New Game (image lower right in collection above) is a deconstructed drawing with digital transformations, available on the full RedBubble product line.
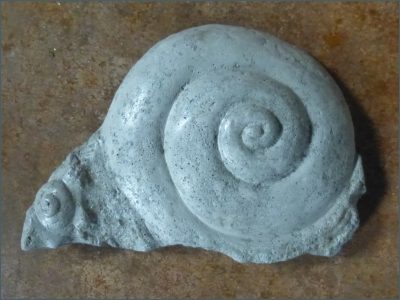
Resin Casts Finish Work
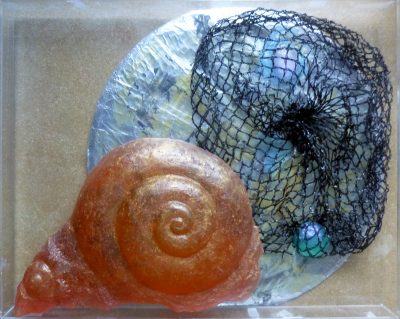
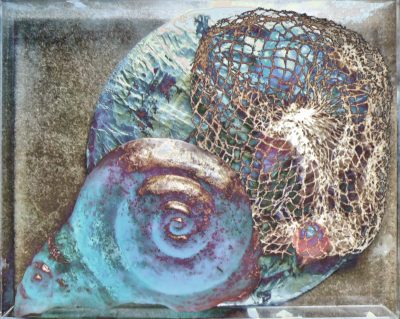
 I am plugging away on resin casts (both this “Ruins” and my Moon Snail. Somehow they just look naked when they emerge from the mold. At first the new cast delights me: if the casting is a success I have a new “baby”! But after a few days I find myself a bit less satisfied…
So that is when I start to play with the surface, brushing or rubbing on a little pigment. This helps to bring these casts into the real world, where uniformity and cleanliness are rare. I take photos and or scans along the way: this helps me see what is working (or not).
This version of the Ruins has four pigments rubbed on here and there, and a clear matte archival coat.
An Art Sale

Cast Resin Moon Snail SOLD
My second art sale for the Moon Snail!
I just SOLD this guy today! I expected to sell the concrete cast for outdoor display, but … the buyer fell in love with this resin yellow guy instead. So she has decided on a place to mount or hang her “chicken head” moon snail inside her house.
She was a friend, so I sold it pretty much at cost of materials. But I am fairly optimistic that I will be able sell another one or two of these Moon Snail casts for a bit more. I could use a bit of money, so that I can justify my obsession, and so can keep buying the supplies and tools for carving and making more molds, and … all that!
And after all this my most a popular image: I sold the original limestone carving very quickly, and for a very nice price!
I am quite delighted to know these are enjoyed!
Finish Work

Holiday Time


A few days ago the holiday season hit me, and yes, that is how it felt!
So I made myself a very personal holiday season “tree”, after realizing that my resin casts of a piece of coral would be great hanging ornaments! Yes, it looks a bit more like a menorah than a tree, but that is coincidence: the brass candlestick is just heavy enough to balance my chosen curly branch, and the design went from there based on just the right things coming to hand in my studio. Well I did spend an hour searching for the dried poppy heads after realizing the one at hand was so perfect!
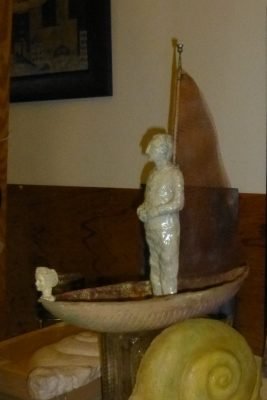
I had already started on “Three Ships Come Sailing In” but only have two ships so far…
Artwork in the Studio Today
I poured some concrete in the studio today: I poured concrete into my two most current molds. So I hope to have good concrete casts of the Moon Snail and the Blue Ruins molds for outdoor display. I will take them out of the molds Tuesday afternoon or Wednesday morning. I had a lot of air bubbles, so I jiggled & jiggled them (the manual vibrating table 😉 technique).
I don’t like doing concrete work indoors, but needs must: it is too cold outside! I managed to avoid too much mess.
And I did a little more photography this morning, in an effort to like my orange moon snail better. This photo was not a natural for the digital foil technique, so I did a lot of adjusting to get the image at right, but I am still not impressed by it. Clearly I need to get over this orange cast, and move on to new artwork!